![[Previous]](prev.gif) |
![[Contents]](contents.gif) |
![[Index]](keyword_index.gif) |
![[Next]](next.gif) |
![[Previous]](prev.gif) |
![[Contents]](contents.gif) |
![[Index]](keyword_index.gif) |
![[Next]](next.gif) |
This chapter describes working with an application as a whole in PhAB.
This chapter includes:For information on running an application, see the Generating, Compiling, and Running Code chapter.
The way you create a new application depends on whether you're using PhAB from the IDE or standalone.
To create a new PhAB project, see “Creating a QNX Photon Appbuilder project” in the Developing Photon Applications chapter of the IDE User's Guide. When you create a new project, the IDE opens PhAB, and you see the New Window Style dialog where you can select the type of base window for your application.
To create a new application, choose New from the File menu or press Ctrl-N. If you're already working on an application, PhAB asks if you want to save any changes to that application before closing it.
PhAB creates a new unnamed application that consists of a single main window named base. PhAB displays a dialog where you must choose the style of the base window:
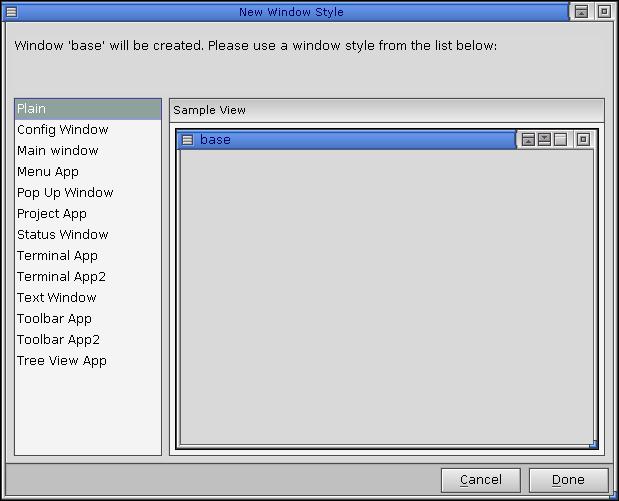
Choosing the style of the base window.
After creating an application, you should:
 |
You should develop a naming convention for all the widgets, modules, functions, and so on. This will make managing your application easier. |
The way you open an existing application depends on whether you're using PhAB in the IDE or standalone.
To open an existing PhAB project, see “Reopening PhAB” in the Developing Photon Applications chapter of the IDE User's Guide.
To open an existing application, choose Open from the File menu, press Ctrl-O, or choose Open from PhAB's toolbar:

The Open button on PhAB's toolbar.
You'll see the application selector:
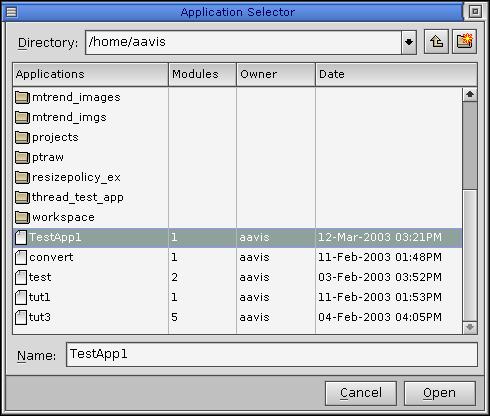
Application Selector dialog.
If the application you want is in another directory, type the directory name in the Application Directory field, then press Enter, or browse to the directory. To enter a directory, double-click it. To go one level up in the directory structure, click the up arrow directory in the top-right corner of the dialog, or double-click the .. folder in the file list.
To choose the application, do one of the following:
Or:
Or:
 |
If someone already has the application open, PhAB won't open
it unless you started PhAB with the -n option.
If you're using NFS or SMB, you should start PhAB with the -n option because you can't lock files with either. For more information, see appbuilder in the QNX Neutrino Utilities Reference. |
You can save your application in several ways, as described in the sections below.
 |
To ensure the latest changes to your application are in effect, PhAB automatically saves your application whenever you regenerate or make your application code. |
For information on using version-control software with PhAB applications, see “Version control” in the Generating, Compiling, and Running Code chapter.
How you save your application depends on whether you're running PhAB from the IDE or standalone.
When you run PhAB from the IDE, all file management is handled by the IDE. However, you can save the PhAB portion of the project by choosing Save from the File menu in PhAB. For information on managing projects in the IDE, see Developing C/C++ Programs in the IDE User's Guide.
To save a new unnamed application or to save an application under another name or in a different directory:

 |
If you type a new directory name, it's saved. The next time you want to look in that directory, click the button to the right of the directory field and select the directory from the list. |
 |
If you rename an application, you'll find that the name of the executable
is also renamed if the project is an Eclipse-style project. However, if it's an
older-style project, the application name isn't changed. This is because PhAB doesn't
change the Makefile. In this case, to change the name of the executable:
|
To save an existing application, choose Save from the File menu, press Ctrl-S, or select the Save button on PhAB's toolbar:

The Save button on PhAB's toolbar.
To overwrite an existing application:
Or:
When using PhAB from the IDE:
To close an application in standalone PhAB, choose Close from the File menu. If you've made any changes but haven't saved your application, PhAB asks if you want to save it.
The Project Properties dialog lets you set up the typical operations that are performed when an application starts. You can:
To open this dialog:
Or
Here's the dialog, with some sample information filled in:
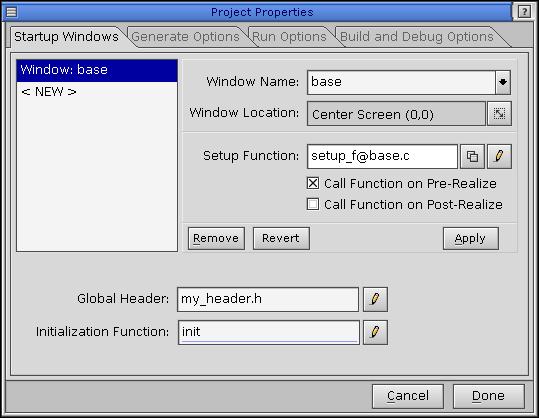
The Project Properties dialog.
Once you've made your changes, click Done.
Here's the Startup Windows tab, with some sample information filled in:

The Project Properties dialog—Startup Windows tab.
You can use this tab to define:
When you first create an application, the mandatory base window is preset as the initial and only startup window. Using the Application Startup Information dialog, you can tell your application to:
The window that appears first in the Windows Opened/Startup list is the initial startup window:
Typically, the application's main window is the first created.
For each window in the startup list, you can specify information that's identical to the information used to create a module-type link callback, as described in the Editing Resources and Callbacks in PhAB chapter.
The information for each window includes:
The buttons below the function name determine whether the setup function is called before the window is realized, after the window is realized, or both.
To add a new window to the startup window list, click <NEW>, fill in the window information, and click Apply.
To modify an existing startup window, select the window from the “Windows Opened/Startup” list, enter whatever changes are needed in the window information fields, and then click Apply.
To delete an existing startup window, select the window from the “Windows Opened/Startup” list and click Remove.
Most applications have a global header that's included in all source code files. If you plan to use a global header in your application, you should set up the header before PhAB generates any code. This lets PhAB automatically include the header in each file it generates.
To set up a global header:
For example, to set up a globals.h header file, you can simply enter: globals
 |
If you specify the header after some code has been generated, you'll have to go back and manually add the header to the stub files that were previously generated. |
Your application can include an initialization function that's called before any modules or widgets are created. In it you can initialize data, open widget databases, set up signal handlers, and so on. To set up an initialization function:
When you specify a setup function, PhAB generates a stub function; for information on specifying the language (C or C++) and the filename, see “Function names and filenames” in the Working with Code chapter.
The Generate Options tab lets you:
Here's an example of this tab:
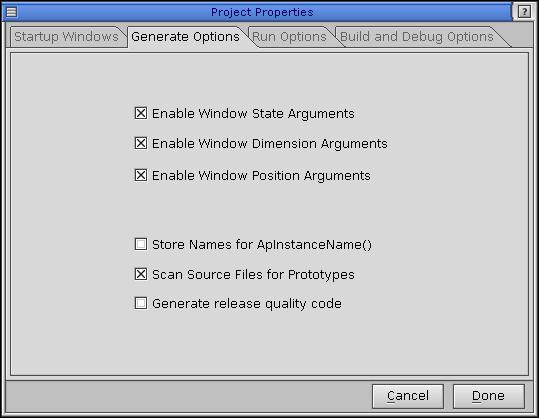
Build and Debug Options tab of the Project Properties dialog.
By default, all PhAB-generated applications have the following command-line options:
| If server_name is: | This server is used: |
|---|---|
| node_path | node_path/dev/photon |
| fullpath | fullpath |
| relative_path | /dev/relative_path |
By default, all these options are enabled so that users can dynamically move or resize the application, or specify its initial state. For example, to start an application in console 4 (the center of the workspace), specify the command-line options:
-x100% -y100%
The PhAB API processes these options before it calls the initialization function; if you plan to add your own command-line options to an application, make sure you pick options that don't conflict with these. You should also code your option processing to handle and ignore these options. If you don't, you'll see errors on the console when you run the application. See the discussion on the initialization function in the Working with Code chapter.
If you don't want users to move or resize the application:
You can set project-generation options for storing widget instance names, generating proto.h, and generating release-quality code.
 |
Including instance names increases the amount of memory required to run your application. |
Use ApInstanceName() to find this string for a widget—see the Photon Library Reference for more information.
Here's an example of the Run Options tab:
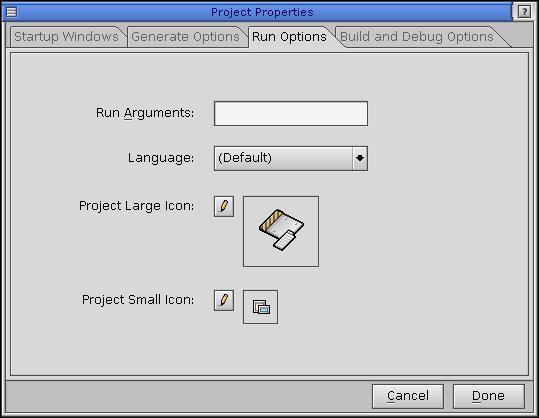
Run Options tab on the Project Properties dialog.
Use the Run Options tab to specify:
This tab of the Project Properties dialog lets you specify options related to the build and debug process. Here is an example of this tab:
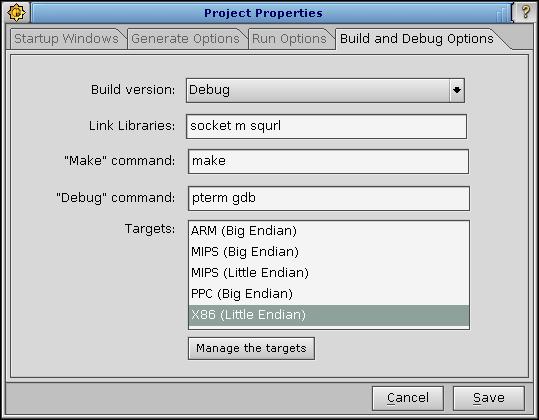
Build and Debug Options tab of the Project Properties dialog.
You can't specify link options in this field, except for the -B option, which specifies static or dynamic linking. For example, you could enter: -Bstatic -lphexlib -Bdynamic.
An exception to this rule is pre-6.3 projects which are not yet converted using . Those projects require the -l option, and take any linker command in this field.
 |
The content of Link Libraries is saved in the indLfiles file and is included in the Makefile in the target directory. |
PhAB lets you import several types of files by using the Import Files item in the file menu:
The steps are the same for all types:
When importing a PhAB module from another application, the file selector may display several modules. Each type of module has a different file extension; see “Module types” in the Working with Modules chapter.
 |
Callbacks aren't imported, only the module and the widgets themselves.
After importing the module, you can attach new application-specific
callbacks.
You can copy and paste widgets or modules between two phab sessions in order to preserve the callbacks (you have to make sure the Clipboard Operations: Save/Restore callbacks option is set in the Preferences dialog). Or you can save the modules or widgets as templates, and choose to save the callbacks with the templates. Normally, PhAB retains the instance name of each imported widget. However, if it detects a duplicate name, it changes that name to the widget-class name to avoid code-generation errors. |
You can import X bitmap (XBM) files using the Import menu item. XBM image data is mostly found in header files (with a .h file extension) and in separate XBM bitmap files (with no file extension). To import an XBM image, use the Import menu item to open the header file containing the image data.
When importing graphics images, the file selector displays all files with the following extensions:
PhAB imports the graphic as a PtLabel into the currently selected module, and sets the widget's Pt_ARG_LABEL_TYPE resource to Pt_IMAGE. If you wish to edit the imported image, use the pixmap editor, as described in the Editing Resources and Callbacks in PhAB chapter.
You can export the code used to create a module. To do this, select . A fragment of C code that creates the widgets in the currently selected module is written to the home directory in a file called module.code.
![[Previous]](prev.gif) |
![[Contents]](contents.gif) |
![[Index]](keyword_index.gif) |
![[Next]](next.gif) |